Foodiddy has moved to http://foodiddy.com. There is already a new Cheesesteak Kebabs post up, so change your bookmarks, update your RSS Readers and I hope to see you over there! I sent an email to all subscribers – sorry that the new blog doesn’t have the “subscribe” feature yet, but I’m working on installing a plug-in so you can continue to subscribe to get new posts. Until then, you will just have to visit the old-fashioned way – by using your browser to surf to the URL. All past recipes/posts have been moved over – so nothing has really changed except for the web address. I look forward to seeing familiar faces and comments over there. Thanks so much for your continued support with my newest endeavor.


Foodiddy has moved…
September 15, 2010
Crazy Hat Party
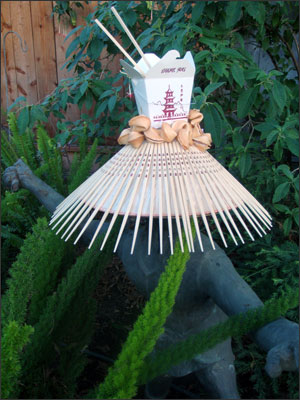
September 12, 2010We headed to the bay area on Saturday for a Crazy Hat Party. Our friends Paul and Tom were hosting and I knew I needed to create the perfect hat. Since I’ve been obsessed with all things “Food” lately – I came up with a food concept and spent last weekend searching for supplies.
The first stop was Chinese food for lunch. Our goal was to score some “to go” containers. I barely ate any of my chicken salad, so I asked for a “to go” box and our server brought us one of those clam shell styrofoam compartment boxes. I saw shelves of the cardboard wire closure boxes in the hallway next to the bathroom. I grabbed my purse and planned on “borrowing” a few. All of the containers were sealed in plastic sleeves – foiled again. We got our food and had lots left. This time I asked for the smaller cardboard “to go” boxes and our server delivered two to the table. SCORE! I scooped our food into the styrofoam one with the salad, filled one with the least messy food – fried wonton and then slipped the unused one into the bag.
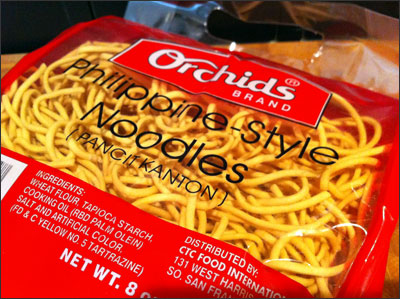
My next stop was Smart and Final for chopsticks. I didn’t like the ones they had, but picked up some Pancit Kanton, Phillippine-Style Noodles for a whopping $1.89.
I then went to an Asian Market and picked up some cool chopsticks (5 packs for 75 cents each) and fortune cookies – a bag with over 50 for $3.00. The Chinese gardening hat was found at the Halloween Spirit Store for $7.99 – this was before I went to the Asian Market – could have picked one up there for $1.99 – ugh. Too bad the Halloween store doesn’t do returns.
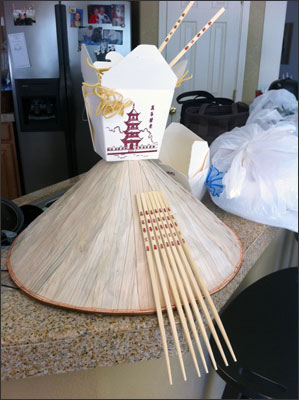
The hot glue gun process began. Spacing the chopsticks was a bit of a nightmare. Thankfully Dan helped with the engineering.
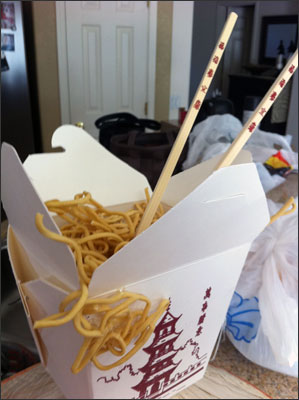
Dan also helped cut a circle in the container to glue it to the hat. Then I got my Pancit Kanton (noodles) loaded on top of tissue paper that I stuffed into the “to go” container. Hot glue-gunned noodles, yummy!

Dan modeled my hat after finishing it last weekend. It came out really cool and I was excited to wear it to the party.
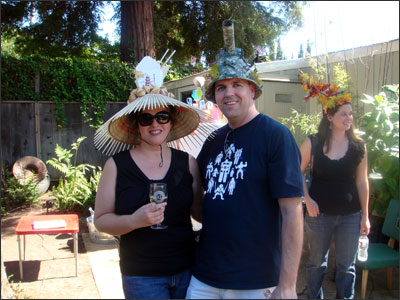
The hat in action… Dan’s hat was a military themed hat. We both got lots of compliments on our masterpieces.
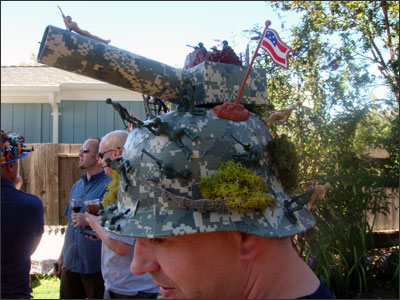
Love the army guy up on the turret. Green men were on one side, tan men on the other. He used a roll of camo tape to cover a germen helmet from the Halloween Spirit Store. Our friend Deede went to Toys R Us and Joanne’s with us to grab up all the other supplies.
It was a blast looking at the other party hats. I tried to get photos of each one, but balancing my enormous hat, a glass of wine and the camera proved to be a little challenging.

Matching lamp shade hats, a drum cover with ribbons and Tom’s hat – covered in every plastic figurine you could think of. It was awesome!
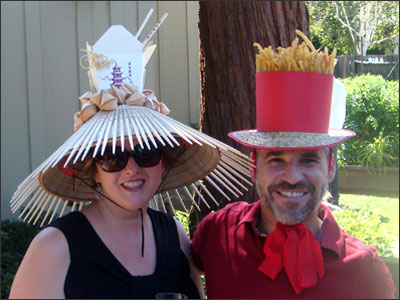
Foodies/besties for life. I LOVED Paul’s french fry hat. He used 3 bags of fast food style frozen french fries. He had to let them dry out for 3-4 days after cooking – they were too greasy to glue – yum! He also had to add the tie, because the construction paper red ring made the hat too small for his head. If the fries weren’t stale and covered in glue, I totally would have grabbed one off his head – they looked that good!

Loved the Pantone/paint chip and the walking foliage with butterflies hats.

La la la-la la la, Sing a happy song – the Smurf hat rocked!

A top hat/flower-pot making homemade ice cream. Yum!

Taking over the ice cream cranking. This hat had lots of photos and other vacation/travel memorabilia.
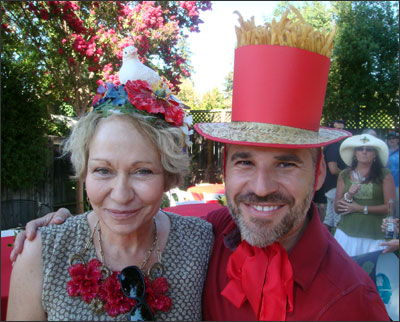
Leigh and Paul showing off their creations. The dove and flower hat was made out of a “Frosty the Snowman” head she cut open. She found the snowman head and the flowers at Michael’s. Very crafty! She also makes jewelry, so her necklace matched the flowers on her hat. Very chic.

Hah! Hah! Panties, lumpy legs and dangle feet – what more could you ask for?
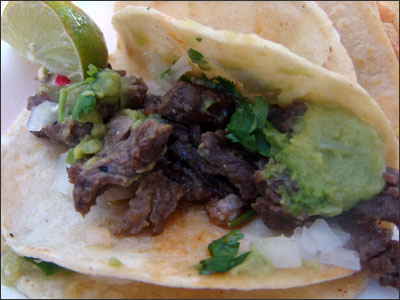
FOOD! Yes food…there was amazing food. Paul and Tom hosted a taco cart. Didn’t get a photo of the actual cooks or cooking station, but the tacos were killer. Steak, chicken or potato – I actually had one of each. The couple that did the cooking came all the way from Modesto, CA. They had beans and rice as sides and onion, cilantro, radishes and two different salsa toppings for fixings. Party food perfection.
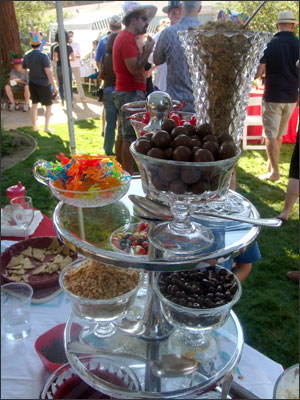
The dessert table had platters of cookies and the wonderful homemade vanilla custard ice cream – with all kinds of fun toppings.
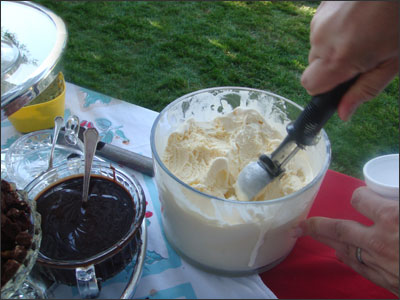
Ummmm… Yummy ice cream.
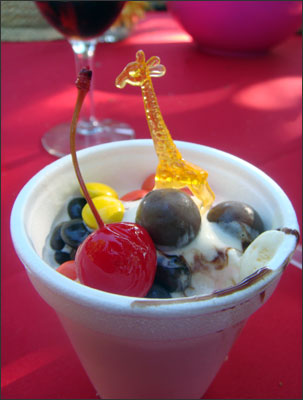
Is that a giraffe in my ice cream? Why yes it is! Truth be told – I actually ate my dessert first. The taco line was so long, my table got up and hit the dessert table first… breaking all the rules.
I had a blast catching up with old friends, meeting new ones, hearing everyone’s hat decor stories and just chilling with good, good people. I wish I had taken even more photos. I missed capturing so many of the really great hats.
Today will be spent cleaning house, doing laundry, grocery shopping and Foodiddy recipe planning for the upcoming week. Hope everyone enjoyed their weekends as much as I did.


Two-Color Ziti Fake-Bake
September 10, 2010The September Everyday with Rachael Ray magazine had a 30-minute meal recipe for Two-Color Ziti Fake-Bake. It looked like something that both Dan and I would like and I thought it would be perfect to portion out and freeze for future lunches/dinners. I also loved that it used kale – since I seem to be on a kale kick.
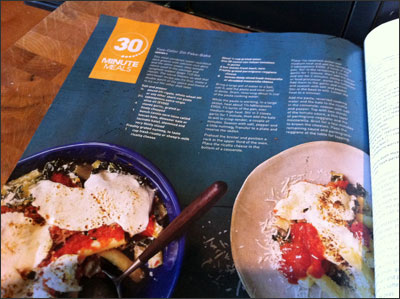
My end result looked nothing like the magazine photo, but I’m o.k. with that. The reason being – mine looked way better, hah!
The Ingredients:
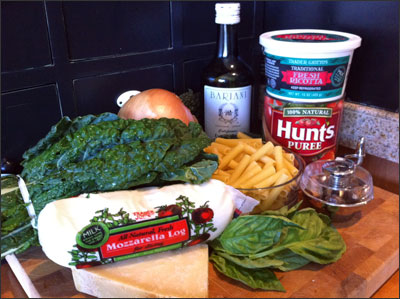
3/4 Pound Ziti Pasta
3.5 Tablespoons Extra Virgin Olive Oil
4 Cloves Garlic – grated or finely chopped
1 Bunch Kale – the recipe suggested Tuscan or dinosaur – I got organic dinosaur – taken off stems and thinly sliced
Freshly Grated Nutmeg – to taste
1 Cup Fresh Ricotta
1/4 Cup Grated Onion – I chopped mine
One 28 Ounce Can of Italian Tomatoes in Puree – I just used Hunt’s Puree
A Few Fresh Basil Leaves
8 oz. Thinly Sliced Fresh Mozzarella
Freshly Grated Parmigiano Reggiano Cheese – I probably used 1/2 Cup or more
Bring a large pot of water to a boil, salt and add the ziti pasta. Cook until al dente. Drain, reserving about 3/4 cup of the pasta cooking water. I just set my aside in a measuring cup.
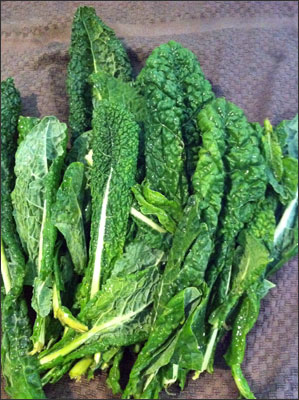
I prepped the kale while the pasta cooked.
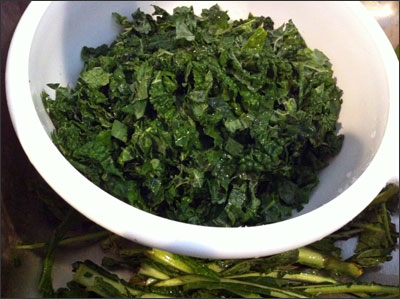
I took it off the stems, thinly sliced it and gave it a second rinse. Apparently “Organic” means straight out of the ground – this bunch had tons of soil between the leaves.
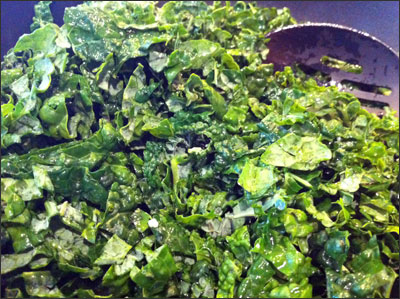
I sautéed the kale with 1.5 tablespoons olive oil and garlic. I stirred until the kale became wilted and then added the freshly ground nutmeg, salt and pepper and then transferred to a plate.
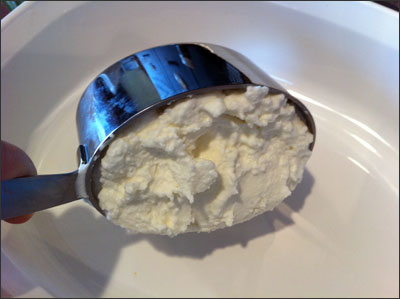
I measured out the ricotta into a casserole dish and placed it under the broiler.
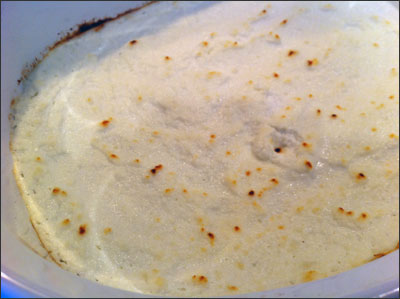
You want to make sure the oven rack is in the upper third of the oven.
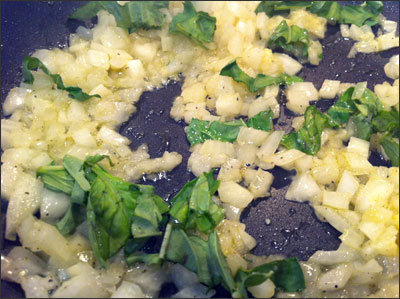
I used the same sauté pan from the kale for the next step. Heat the remaining olive oil and onion, 2 cloves of garlic and basil over medium heat. The recipe then tells you to use a blender or food processor to puree the tomatoes. I just bought pureed tomatoes, so I opened the can and added the puree to the onion, garlic and basil. I then added salt and pepper to taste. I lowered the heat and let it simmer for about 5 minutes.
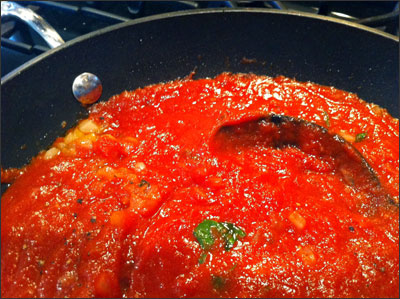
The next step was to build the casserole dish.

I added the pasta, reserved cooking water and the kale on top of the golden browned ricotta.
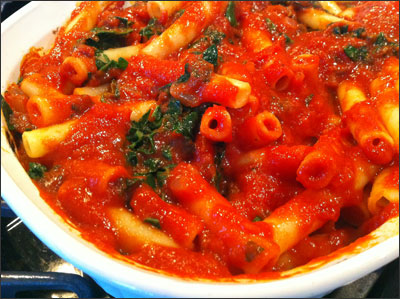
I then added all of the sauce to the pasta and then topped with freshly shredded Parmesan and the sliced fresh mozzarella. The recipe wanted me to only use 2/3 of the sauce and use the rest at the table. Nope – I just added it all and I’m glad I did – the extra sauce was the perfect amount. It also suggested a thin layer of Parm, I used a thick layer and I didn’t have giant spaces between my fresh mozzarella – I set each piece next to each other. Probably why mine didn’t look like the magazine photo after cooking. I placed the dish under the broiler for about 8-10 minutes until the cheese was golden and bubbling.
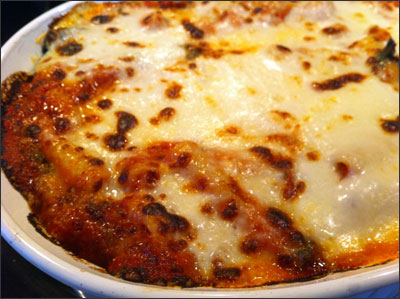
The recipe says it serves 4 – I think it was more like 6-8.
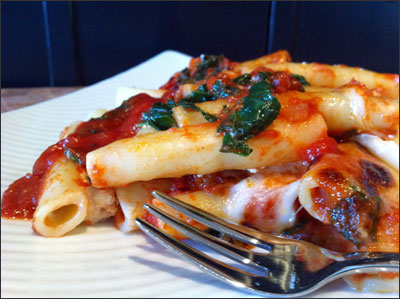
Dan and I both gobbled it up and had plenty of containers for the freezer for future meals. Even though there are a lot of photographs, the prep time was really easy. I love that the only oven time was under the broiler – normally ziti bake takes at least an hour in the oven. Pre-cooking the pasta was a great idea. That Rachael Ray – always thinking of time savers for busy cooks. Love that! This would be an easy mid-week meal. I served it with a warm rustic bread and it was delicious!
Have a great weekend everyone! We’ll be heading to the Bay Area for a crazy hat party on Saturday – I hope to have lots of photos from that.


Corn Chowder
September 9, 2010So I take it you guys aren’t big fans of eggplant pasta, LOL. No worries, today’s recipe is much more sinful.
Yesterday’s weather made me crave soup. The wind, the overcast skies – I knew I wanted to make soup after work. You see, living in Sacramento, CA with hotter temps has made us all think 70 degrees is freezing. Break out the hoodies, blankets and Uggs. No seriously, I’m not kidding.
I had remembered seeing corn for super cheap at the store and corn chowder is one of my favorite soups – so I sat in the parking lot of the grocery store and surfed the Internet on my iPhone to come up with a recipe. I ended up combining several recipes to make my own.
The Ingredients:
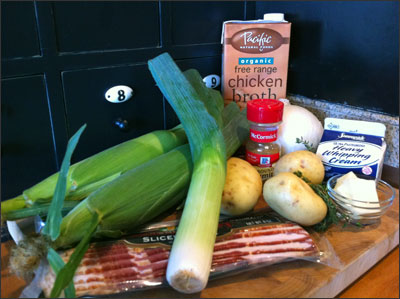
6 Ears of Corn – I used 3 sweet white and 3 yellow – it was just over 3 cups.
8 Ounces of Bacon – Cut into strips
1 Large Sweet White Onion
1 Large Leek – sliced into moon shapes – slit down center and chop
1 Pound Yukon Gold Potatoes – 3 medium = 1 pound
2 Tablespoons Unsalted Butter
2 Tablespoons Fresh Thyme
2 Teaspoons Ground Cumin
4 Cups Chicken Stock
2 Teaspoons Cornstarch – dissolved into 2 tablespoons water
Salt and Ground Pepper – to taste
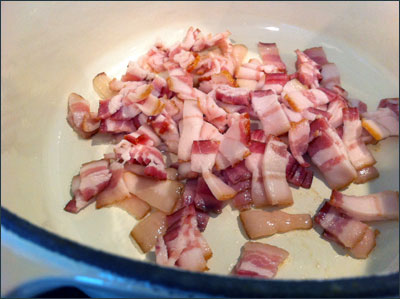
Bacon, bacon, bacon… I love me some bacon. I used a dutch oven and set the stove to a medium heat and added the chopped bacon. Once it rendered a few tablespoons of fat, I increased the heat to high and cooked the bacon until crisp and golden brown. I then poured off all but 1 tablespoon of the bacon fat, leaving the bacon in the pot.
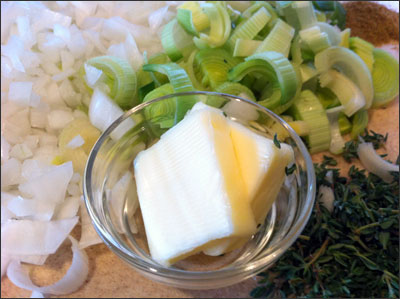
I prepped my onion, leek and thyme and measured out the ground cumin and butter.
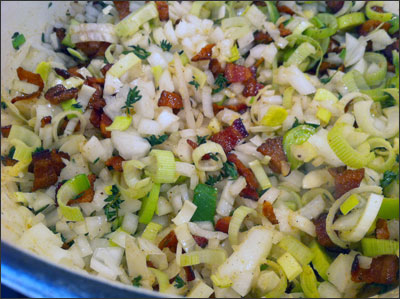
Adding butter to bacon fat felt so wrong, but so right at the same time. The smells coming from this pot were heavenly. I Sautéed the ingredients, stirring occasionally until the onion and leeks were soft.
I then added the corn, potatoes…
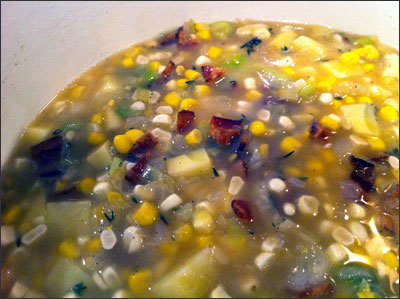
and chicken stock to the pot. I brought things to a boil and cooked for 15-20 minutes until the potatoes were soft. I used a potato masher to mash some of the corn and potatoes in the pot. I reduced the heat to medium.
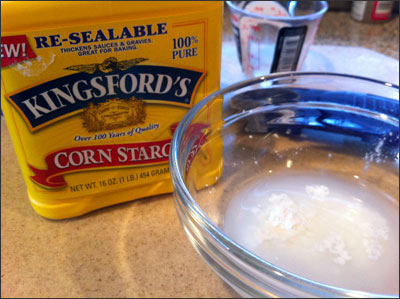
I added the corn starch and water mixture and waited for the soup to thicken a bit. The mashing really helped to thicken it as well. I let the soup simmer for about 5 more minutes – stirring it throughout. I then pulled it off the heat and let it sit for a few minutes.
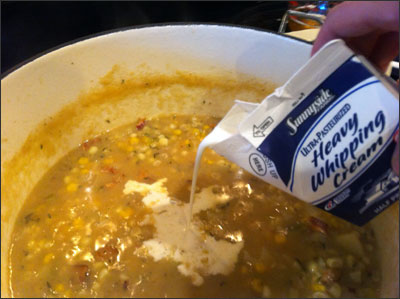
I added the super sinful heavy whipping cream and continued to give the chowder a good stir. I did try the soup before adding the chowder and it was really good. You could omit that step if you are really watching calories. Me, not so much. I wanted mine super creamy and rich. I added salt and pepper to taste.
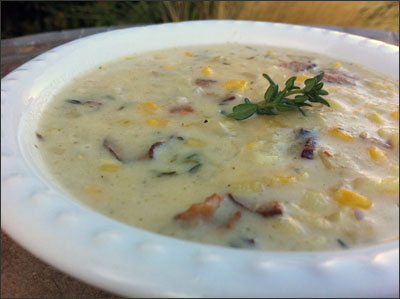
Outdoor photo with what natural light was left…
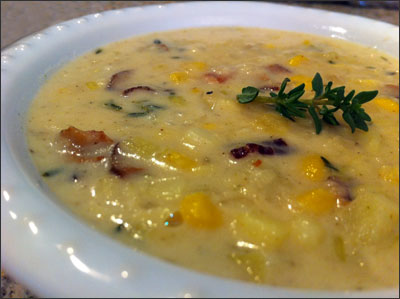
Indoor photo just before diving in. I seriously had to refrain from eating 2-3 bowls of this chowder. I stopped after one and have been thinking about it ever since. Sort of like the scalloped tomato dish. I have bowls stacked in my fridge ready to go for lunches.
I found so many corn chowder recipes the included bell pepper, cheese and many other interesting ingredients. I am happy that I omitted some things and added others. 2 thumbs up – I will for sure be making this soup many more times.
Dan came through the front door and thought we were having taco night because of the smells. Taco night is his favorite, guess that will need to happen soon.
So are you a fan of corn chowder? How about clam chowder?


Eggplant Pasta
September 8, 2010I extended my 3 day weekend into a 5 day weekend and really enjoyed the time off. I went to the spa with my Mom, did some shopping, lunching, decorating and exercising – it was a much needed break. I still cooked, but I also ate out with friends. Photos were starting to pile up, so I knew I needed to get going on a post or two.
My girlfriend Deede came over Monday afternoon with all of the ingredients for Alton Brown’s Eggplant Pasta. Her neighbor grows eggplants and tomatoes – score! We ran a couple of errands for another project and then got started on dinner for everyone. We doubled the recipe for 5 people and had a lot left over.
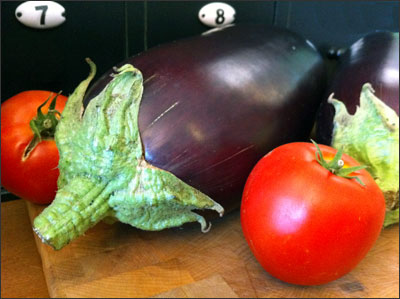
Giant eggplants and tomatoes
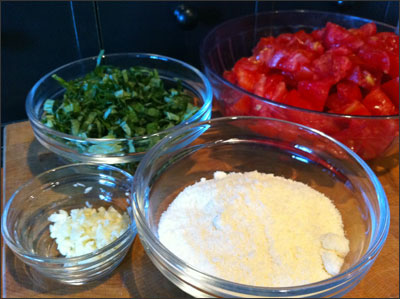
The Ingredients:
2 Medium to Large Eggplants – We used 2.5 giant eggplants
Kosher Salt – used to purge the water out of the eggplant slices
4 Tablespoons Olive Oil
1 Teaspoon Garlic Oil Minced
1/2 Teaspoon Chile Flakes
4 Small Tomatoes – seeded and chopped
1/2 Cup Cream
4 Tablespoons Basil – chiffonade
1/4 Cup Parmesan – freshly grated
Freshly Ground Pepper
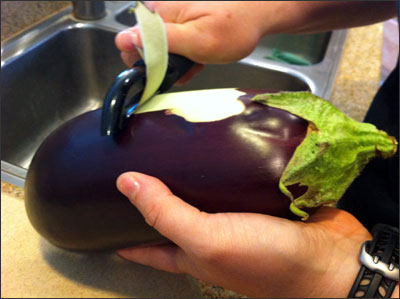
Deede got started on peeling the eggplant. The recipe said to leave 1 inch of skin at the top and the bottom, we didn’t do that.
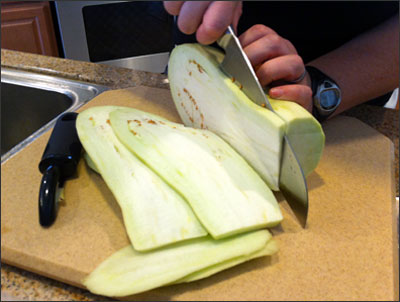
The next step was to cut the eggplant into 1.4 inch slices to get it ready for salting.
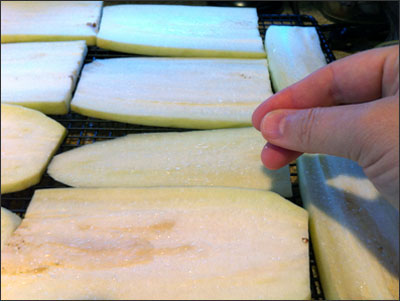
Evenly coat each slice with the kosher salt and purge on a rack for 30 minutes. We had 4 racks going at once.
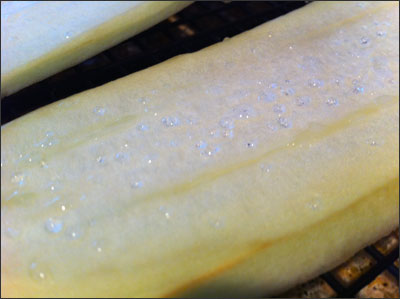
It’s pretty cool to see how much moisture comes out of the eggplant – big drops of water coated every piece.

Rinse with cold water and roll in paper towels to dry.

Slice the pieces into thin strips to resemble pasta. This is when we realized the importance of uniformity. Some of the comments on the Food Network website suggested slicing the initial 1/4 inch thick pieces on a mandoline. Not sure it could have handled the huge size of our eggplants, but definitely worth doing if you have smaller eggplant and actually own a mandoline.
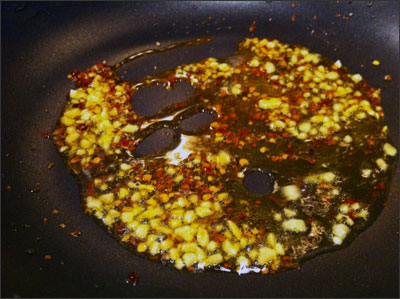
Heat the oil over medium to high heat in a large sauté pan. Add the garlic and chili flakes and toast. We had two pans going at once.
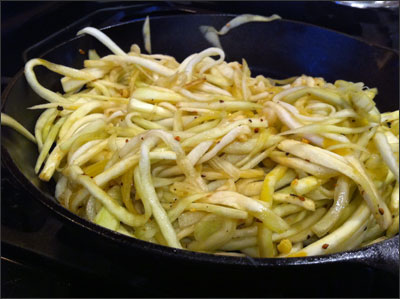
Add the eggplant “pasta” and toss to coat. We let the eggplant cook for about 3-5 minutes. Then add the tomatoes and cook for 3 minutes. Add the cream and increase heat to thicken sauce. Finally add the basil and Parmesan and toss to combine. Season with pepper, no salt needed as the eggplant will have residual salt from the purge process. Serve immediately.
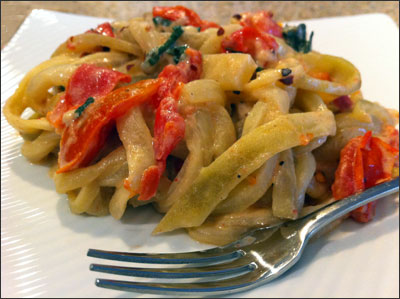
The chile flakes definitely added a zing to this dish. If you don’t want the heat, you could definitely omit or use a lot less. As soon as I dove in, I was busy thinking up additional possibilities – adding sautéed spinach or kale, artichoke hearts, more cheese, a buttered panko topping, etc. I’m excited to try the dish with some tweaks.
Dan was not a fan – he did try the dish, but opted to fill up on the other items – Caesar salad and fresh bread.
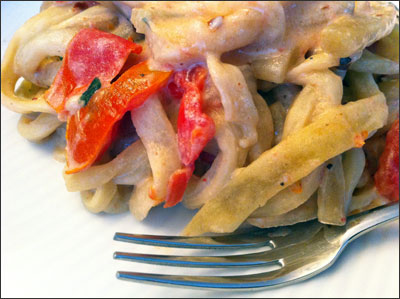
Deede’s husband has put the dish in his “favorites” category. So now I have a zucchini pasta substitute thanks to the slicer and another option with eggplant. To be honest, I am not a huge fan of eggplant, unless it’s breaded and fried, hah! but in this form, I really enjoyed it. The slime factor was absent and the salt purge was definitely the secret to that.
No worries, I haven’t given up pasta – I also made a real pasta dish over the weekend and will be posting that next.


Nat’s Peach Pit Crisp
September 2, 20109/02/10 – It’s 90210 day and I’m celebrating with a recipe for Nat’s Peach Pit Crisp – named after the famous 90210 hangout, The Peach Pit Diner. Yep, just made that name up. Remember Peach Pit After Dark?
The truth is, I actually found Anne Burrell’s recipe on the Food Network website for Peach Crisp. I omitted a few items and increased some of the ingredients and renamed it for the purpose of celebrating the day.
I can’t even begin to explain how obsessed I was with 90210 back when it first aired in 1990. How crazy, 20 years, really? Wow… I taped every episode on the family VCR and I color coded each VHS cassette. I had pins, stickers, trading cards, magazine articles, posters, and most importantly… the FREAKIN’ DOLLS. I had all of the dolls and multiple outfits for each – I still have the boxes and the outfits are sealed in the original packaging and worth about $1.50, hah!
Check out Kelly and Donna hangin’ out on my peaches. “Donna Martin Graduates” – You know you’re jealous… Brandon looks a little possessed, but Brenda sure is rockin’ her Blossom hat. I can’t forget good ol’ Dylan McKay – with his eyebrow scar. Bad boy central.

The Ingredients:
For the Filling
6 Large Ripe Peaches – pitted, peeled and cut into chunks
1 Lemon – zested and juiced
3 Tablespoons All-Purpose Flour
1/4 Cup Brown Sugar – tightly packed
2 Tablespoons Sugar – because the brown wasn’t enough 😉
1/2 Teaspoon Vanilla Extract
Pinch of Kosher Salt
For the Topping
1 1/4 Cups All-Purpose Flour
1/2 Cup Rolled Oats
1/2 Cup Brown Sugar
1/2 Cup Sugar
1 1/4 Stick Cold Unsalted Butter – cut into pea sized pieces
Pinch of Kosher Salt
2 Tablespoons Cold Water
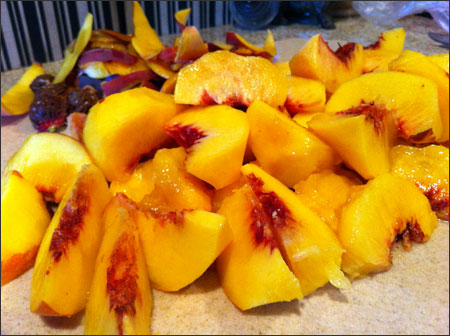
Set your oven to 350 degrees F and then prep your peaches – peel and cut into chunks and place into a large bowl.
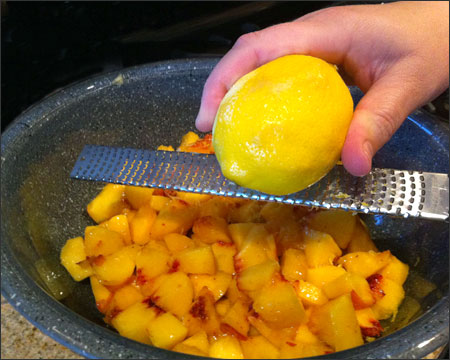
Add the lemon zest and lemon juice and toss.
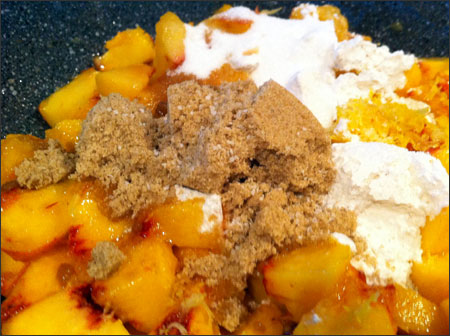
Add the rest of the filling ingredients and stir to combine.
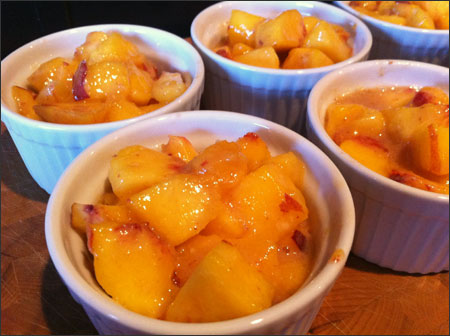
Divide the filling evenly between 8 (6 ounce) ramekins.
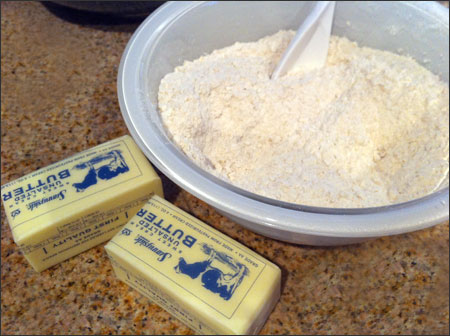
For the topping… combine all of the ingredients in a bowl (except for the water) and mix with your hands. I really made sure that the pieces of butter were evenly dispersed. After a minute or two of mixing, gradually add the 2 tablespoons of water until the mixture is clumpy, but still crumbly.

Place the ramekins on a baking sheet and top each ramekin with the topping. Be sure to loosely sprinkle the topping – you don’t want to pack it down. The idea is for it to be a loose crumble. Bake until the filling is hot and bubbly and the topping is brown and crispy. The original recipe said 20-25 minutes – mine easily took 35-40 minutes.

I added a scoop of vanilla ice cream and was good to go.
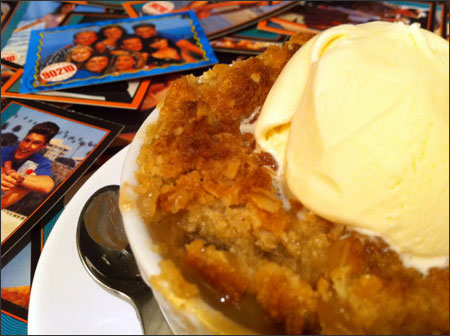
I had fun looking through all of my old trading cards…

And then I dove right in… It was awesome! Dan and I both gobbled it down. 6 more to enjoy…think I’ll be giving some away.
Happy 90210 Day!

P.S. – For all of you original 90210 fans – who was your favorite character?

South of the Border Tomato Soup
August 30, 2010The weather over the weekend was a sneak peek into fall – it was overcast in the mornings and I actually broke out a sweatshirt. I love Fall so much that I knew I wanted to find a soup recipe. My Mom is the “Queen” of homemade soups and it’s time I adopted a similar title.
I have stacks and stacks of magazines full of recipes and I decided I would focus on the latest Everyday with Rachael Ray Magazine. There was a recipe for South of the Border Tomato Soup and apparently I still have an obsession with all things tomato.
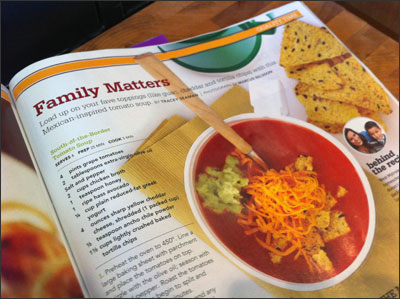
I have always loved a good tomato soup teamed with a grilled cheese sandwich, but this had a different spin and I knew I wanted to give it a try.
The Ingredients:

4 Pints Grape Tomatoes – I had another container in the fridge – that’s a lot of tomatoes, thank God for Trader Joe’s and their cheap grape tomatoes.
2 Tablespoons Extra Virgin Olive Oil
Salt and Pepper
2 Cups Chicken Broth – I used low sodium because I had some left from the Tofu Shirataki Ramen recipe
1 Teaspoon Honey
1 Ripe Avocado
1/4 Cup Plain Reduced-Fat Greek Yogurt – I used Fage 0%
4 Ounces Sharp Yellow Cheddar Cheese – Shredded (1 Packed Cup)
1/2 Teaspoon Ancho Chile Powder
1.5 Cups Lightly Crushed Baked Tortilla Chips – I used Trader Joe’s Spicy Soy and Flaxseed Tortilla Chips
Directions:
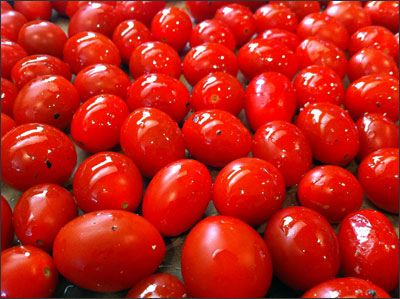
Preheat oven to 450 degrees F. Line a large baking sheet with parchment and place the tomatoes on top. My parchment paper said it could withstand 400 degrees F. I was a little leery to try it at 450, but decided after consulting with Dan to give it a go. No issues, it worked like a champ.
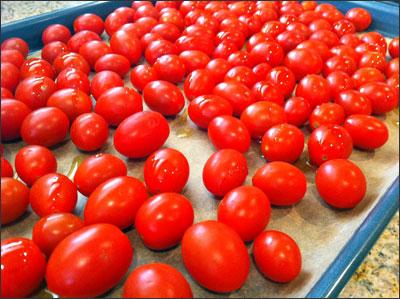
Drizzle tomatoes with olive oil and season with salt and pepper.
Oven shot…
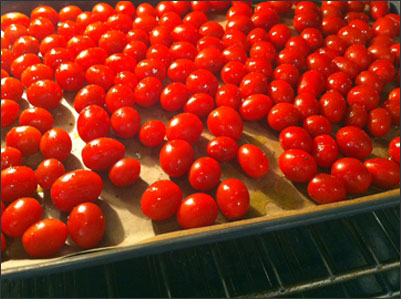
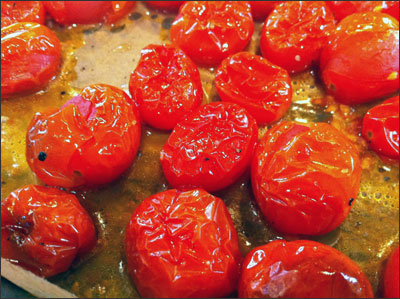
Roast the tomatoes until the skins begin to split and blister, about 15-20 minutes.
Transfer the tomatoes and any of the juices to a food processor.
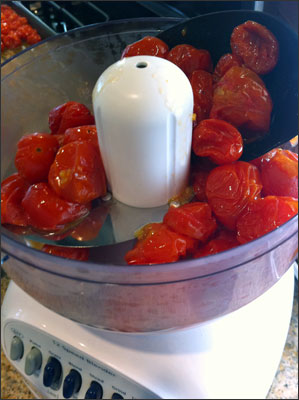
I had to do mine in 3 batches – how sad is it that I had to reference my post on the minty pea and butter bean hummus recipe to see how the blender/food processor went together. Hah! I need to use it more often.
Add 1 cup of chicken broth to the tomatoes and process until coarsely pureed, about 10 seconds.

Force the mixture through a fine sieve/strainer set over a medium saucepan, discarding the seeds and pulp.
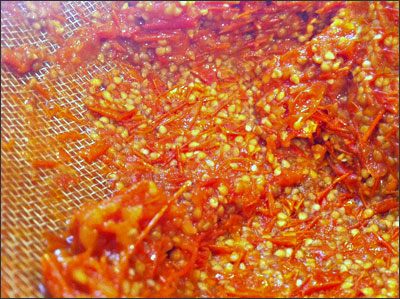
You are left with the above nightmare. Cleaning that puppy was not fun!

Add the honey and the remaining 1 cup chicken broth to the saucepan and bring to a simmer over medium heat, whisking occasionally, about 5-10 minutes.

Season with salt and pepper to taste.
Meanwhile, in a small bowl, mash the avocado; stir in the yogurt and season with salt and pepper. (You could also do this step while the tomatoes are in the oven)

I used a fork to mash the ingredients together.
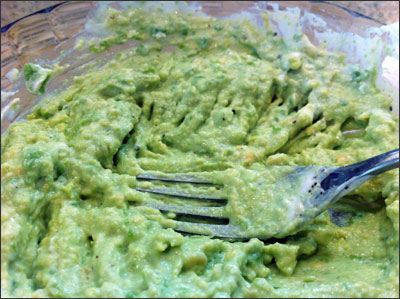
I stored the avo mixture in the fridge and started on the cheese. Place the cheese in a medium bowl and sprinkle the ancho chile powder on top.

Let the soup finish simmering and then ladle into bowls and serve with the avocado cream, cheese and tortilla chips.
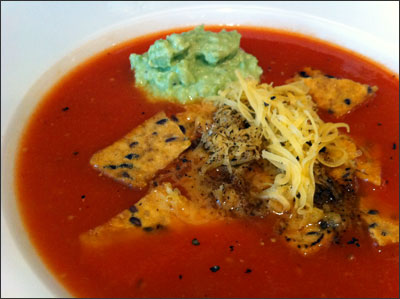
This soup was incredible! Totally worth the extra work and steps of making it from scratch.
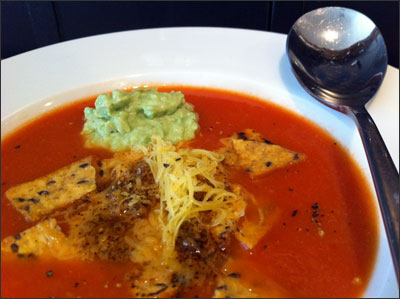
I was able to enjoy a rather large bowl, and I had 3 containers left for lunches or dinners this week.
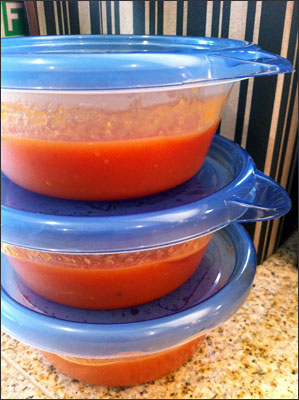
Next time I think I will double the recipe – especially when I can get tomatoes on sale.
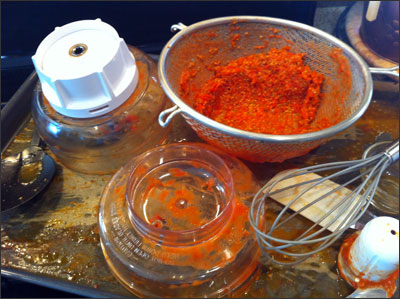
The mess was not equal to the fruits of my labor – a double batch and a full-sized food processor would have helped.
I look forward to many more soup recipes here on the blog and enjoying them all Fall/Winter long.
What’s your favorite soup?


Coconut Shrimp
August 27, 2010It was time to make something that the hub and I could enjoy together. Dan told me when I started this blog not to worry about him for dinners. Sure, he loves when I cook something that he would like, but he’s just not the adventurous type. I love veggies and trying new things. He loves cereal, corn dogs and pizza.
I stumbled upon a recipe in my Taste of Home Summer Appetizer magazine for Coconut Shrimp and I knew he would like it. I attempted to make it on several occasions but never brought the actual recipe to the grocery store – I was always missing 1-2 items. I finally copied the recipe into my phone and yesterday I picked up the last two ingredients on my lunch hour.
The Ingredients:
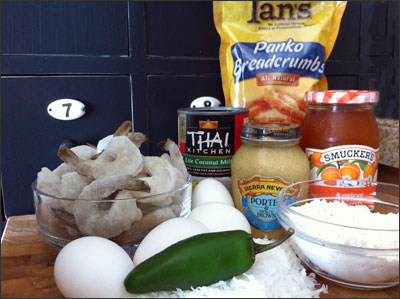
1 Can (14 ounces) Light Coconut Milk
1 Jalapeño Pepper – seeded and chopped
1/4 Cup Minced Fresh Cilantro
1- 1/4 Pounds Raw Medium Shrimp – I used 1 lb. of large peeled/deveined with tails on.
3/4 Cup all-purpose Flour
4 Egg Whites
3/4 Cup Panko Bread Crumbs
3/4 Cup Flaked Coconut, lightly toasted – whoops, forgot that step!
1/3 Cup Apricot Preserves
1 Teaspoon Spicy Brown Mustard
Directions:
Place 2 tablespoons coconut milk in a small bowl, cover and refrigerate. (This will be used in the dipping sauce later)
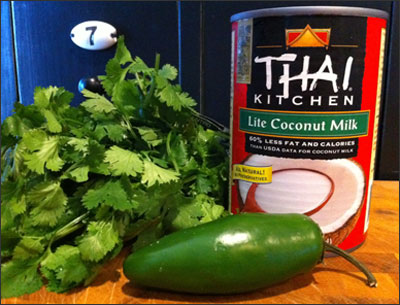
In a large resealable plastic bag, combine the jalapeño, cilantro and remaining coconut milk.

I got my jalapeño and cilantro chopped up for the marinade…
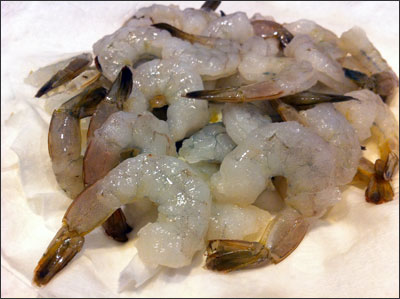
…and my shrimp washed and then it was time to add everything to the Ziploc bag.

I placed the shrimp into the bag and gently turned it to make sure all of the shrimp were coated well with the marinade. I then set the bag in the fridge for an hour while I hit the treadmill.
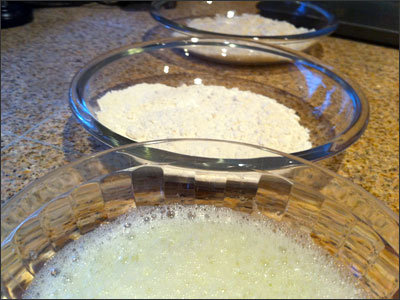
The next step… Place flour in a shallow bowl. In another bowl, lightly beat the 4 egg whites. In a third bowl, combine the bread crumbs and the lightly toasted coconut. I did not toast mine – due to forgetting that step all together. It stuck really well without being toasted. The shrimp would probably turn out more golden if I had done the toasting step. Maybe next time.
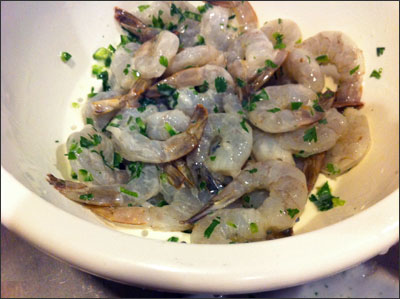
Drain and discard the marinade.
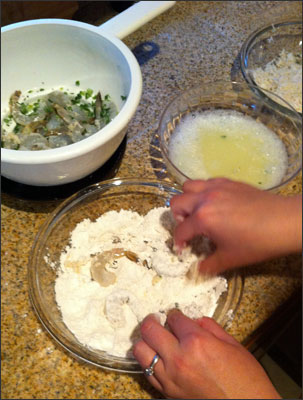
Dip shrimp in flour and then egg whites. Then roll them into the panko/coconut mixture. This took a while, but was worth the effort.
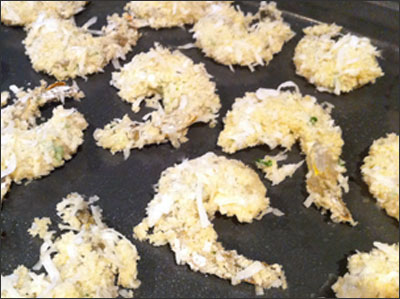
Place the coated shrimp on a baking sheet coated with cooking spray. Bake at 400 degrees for 7-9 minutes on each side or until lightly browned. I turned mine over at 9 minutes and the second side only took about 6 minutes.
I prepared the dipping sauce while the shrimp was in the oven.
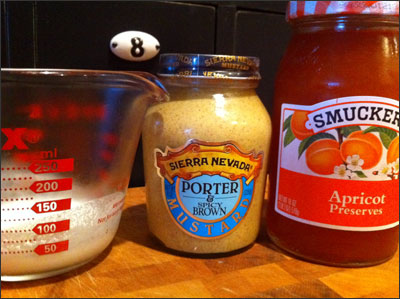
I grabbed the 2 tablespoons of coconut milk out of the fridge and added a heaping teaspoon of Sierra Nevada Porter and Spicy Brown Mustard to 1/3 cup apricot preserves and used a fork to really mix it well.
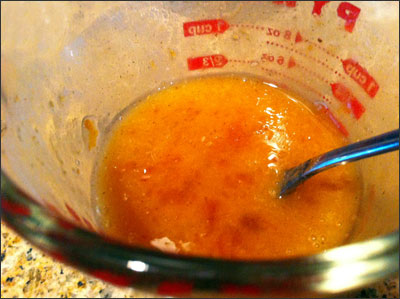
My photos are super orange due to the lack of natural sunlight. No worries – I’m shopping for a new camera 😉 – otherwise the fall/winter months could be really difficult for my food photos after 6:00 p.m.
Back to the shrimp… The kitchen smelled amazing, the timer went off and it was time for plating, final blog photos and eating.
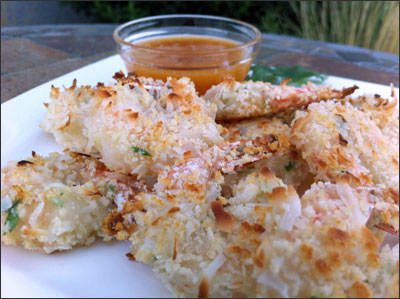
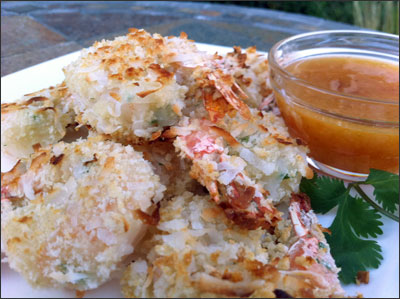
Kind of hard to see their shapes with them piled on the plate.
I just kept wanting to pull the toasted coating off the shrimp pieces.
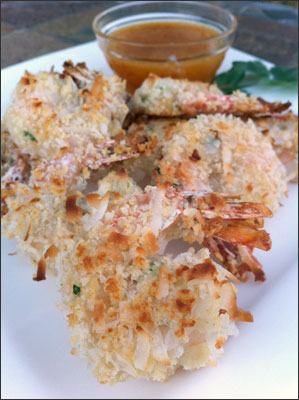
More photos…
More grainy photos…
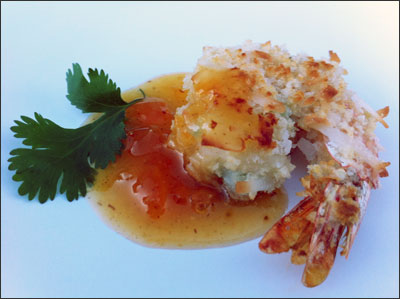
These were iPhone photos with very little light…
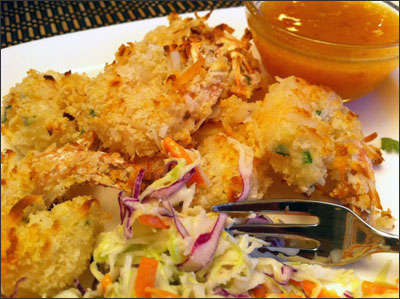
I made a side of coleslaw and we both dove in. We pretty much ate the entire cookie sheet full of shrimp between the two of us. It was awesome! The perfect amount of crunch combined with plump and juicy shrimp. The sauce was addicting – I wanted to lick the bowl.
While it was a more time-consuming meal to prepare, I managed. I worked a full 8 hr. day, got in a 70 minute treadmill workout and still had time to prepare and sit down for a nice dinner with Dan. Couldn’t ask for anything more perfect than that.
Have a great weekend!


Aarti’s Massaged Kale Salad
August 26, 2010So it’s no secret that I’m obsessed with all things Food Network. Watching the 6th season of The Next Food Network Star definitely fell into that obsession. I really liked Aarti Sequeira from the beginning. I loved that she was a food blogger over at Aarti Paarti before going on the show. Her personal style was to infuse Indian cuisine into everyday American foods. She questioned her ability to compete with working/professionally trained chefs, yet she won lots of the competitions and challenges. I was not surprised that she was crowned The Next Food Network Star.
Her first showed aired over the weekend. I set the DVR and watched it on Monday. I really liked her style and the first show had some great recipes. Sloppy Bombay Joe’s – which I plan on making at some point, Massaged Kale Salad, which I did make, and Creamy Pistachio Pops.
I loved the Kale Chips I made back in July…but those were cooked. Raw kale? Who knew? The concept was really interesting to me.
The Ingredients:
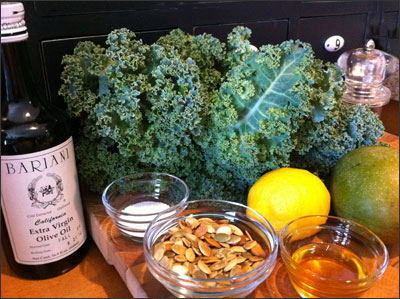
1 Bunch of Kale – She used black kale – I already had regular curly kale on hand – she mentioned that was fine too. (Remove stalks and discard, ribbon slice the leaves).
1 Lemon – Juiced
1/4 Cup Extra Virgin Olive Oil – Plus extra for drizzling
Kosher Salt to Taste
2 Teaspoons Honey – I added a little more
Freshly Ground Black Pepper
1 Mango – Diced small (about 1 cup)
Small handful toasted pepitas (pumpkin seeds) – about 2 rounded tablespoons – I used about 4 tablespoons.
Directions:

Wash your kale and then pat dry with paper towels.
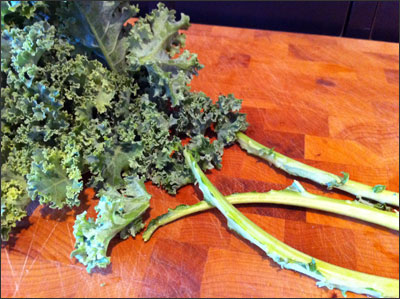
Using your hands – strip the kale off the stalk. This was very easy. I just held the stalk firmly and used my hand to slide through the curly leaves – they came right off the stalk very easily.

You are left with a pretty big pile of kale leaves. The idea is to roll them up as best as you can and then use a sharp knife to finely slice the kale into ribbons.
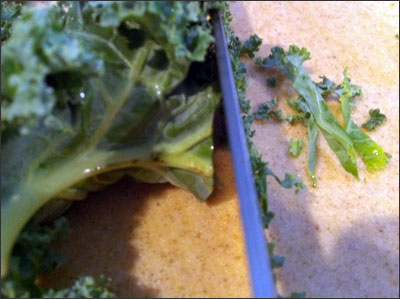
The curly kale made the process a little harder than what Aarti did with the black kale, but it worked in the end. I added the kale ribbons to a large bowl with 1/2 the lemon juice, a drizzle of oil and a little kosher salt.
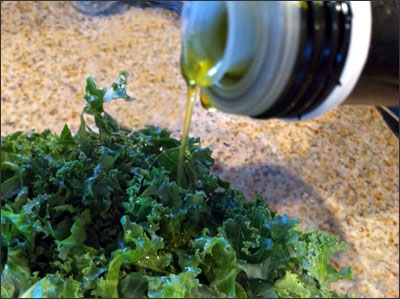
You then dive right into the bowl with your hands. Massage the kale, lemon, oil and salt mixture until the kale starts to soften and wilt. I had a photo of me massaging the kale, but my hand looked like a giant ham hock and that was really disturbing. Massage the kale for a good 2-3 minutes. Aarti mentioned that it will start to smell like bananas – not so much, never got the banana aroma.
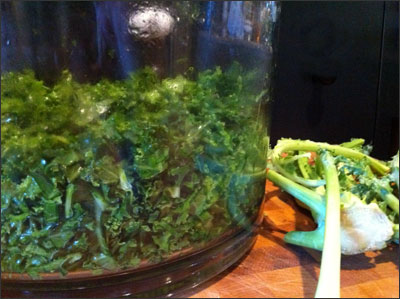
The volume of the kale definitely changed – before massaging, the kale was almost to the top of the bowl. It was amazing how much softer it got after the 3 minutes.
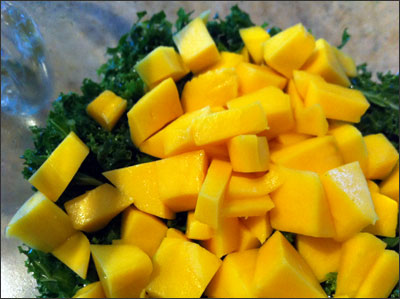
I got my mango chopped and then I started preparing the dressing.
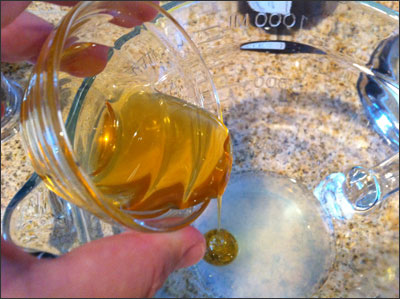
I whisked together the remaining lemon juice, honey and freshly ground black pepper. I then slowly added the 1/4 cup of oil, while whisking until it formed the texture of a well mixed dressing. I tasted it, added some more honey and some more lemon juice – I thought it was a little too oily.
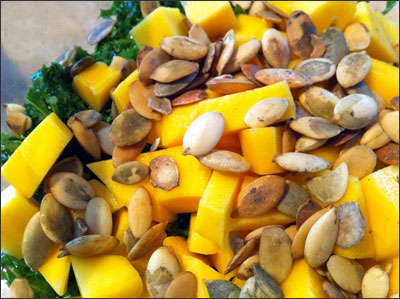
I added the pepitas to the salad and poured on the dressing, tossed, and then plated.
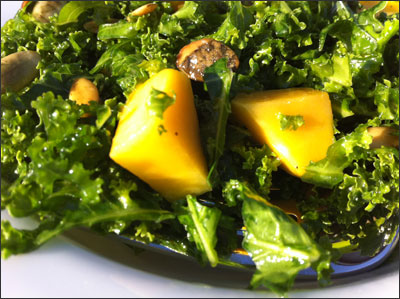
Outside photo with sunlight…
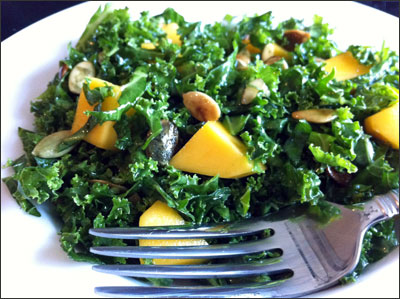
Inside photo with my iPhone…
What an amazing salad. It was perfect for a 106 degree day. I ate a small bowl, had some cheese toast with celery root and carrot salad and then had a hot date with my treadmill and the Rachel Zoe Project, followed by Top Chef and another small bowl of the salad – OMG, it tasted even better after marinating in the fridge for longer. The salad is addicting. Aarti mentioned on her show that because of the hearty structure of kale, it will hold up for several days in the fridge – dressing and all. What an awesome lunch option for me, love it!
I’m really looking forward to future Aarti Party shows. It’s about time I kicked things up Indian style. This blog was about branching out and trying new foods and styles of cooking. Never in a million years did I think I’d be looking forward to seconds, thirds and fourths of a raw kale salad.
Go me…


Tofu Shirataki Ramen
August 25, 2010Back in my Weight Watcher years (2003-2005) Hungry Girl started mentioning House Food’s Tofu Shirataki Noodles. Hungry Girl posted a recipe for Fettuccine Hungry Girlfredo! that used Laughing Cow Light Cheese. I couldn’t find the noodles (back in 2005) in any local stores. I ended up ordering them online – they came in a fresh packed cooler. Us Weight Watcher girls weren’t going to pass up a pasta option that yielded only 1 point per package. 40 calories with 4 grams of fiber and only 6 grams of carbs – FOR THE ENTIRE package.
Once I got my noodle delivery, I sliced open the package and OMG, they STUNK so freakin’ bad. People had talked about the smell on the Weight Watcher message boards. They had a fishy/formaldehyde smell to them. Come on, you know you want some after that glorious description. hah!
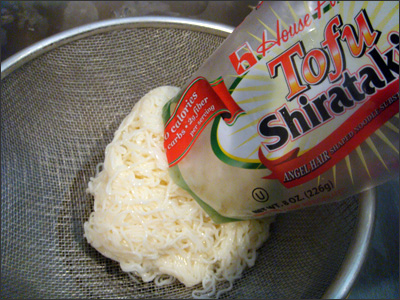
The ingredients included: Water, Tofu (Water, soybeans, calcium sulfate, glucono Delta Lactone), yam flour and calcium hydroxide. I honestly could barely stand the smell. The directions stated that you should rinse thoroughly and parboil for 2-3 minutes (or 1 minute in the microwave) to reduce the authentic aroma. Authentic? Yes, that would be a stretch. “Stank ass” would be a better description. I did get used to the smell and the parboiling was key – it did go away.
I was really excited when Trader Joe’s, Whole Foods, Raley’s/Bel Air and Nugget Markets all started carrying the tofu noodles. They became a regular staple in my Weight Watcher’s point counting diet.
I was never able to find the angel hair shaped noodles, only the fettuccine. I then stopped my Weight Watcher’s point counting obsession and I forgot all about the noodles for years. I was shopping at Trader Joe’s a few weekends ago and I saw them. They had the angel hair and I knew I wanted to give them a try. My goal was to create a less fattening ramen noodle soup. Did you know that a regular package of Top Ramen has close to 400 calories, 14 grams of fat, over 50 grams of carbs and nearly 2000 mg. of sodium? That’s crazy! I used to eat 2 packages for dinner while in college. Cheap, but definitely unhealthy.
The Ingredients:
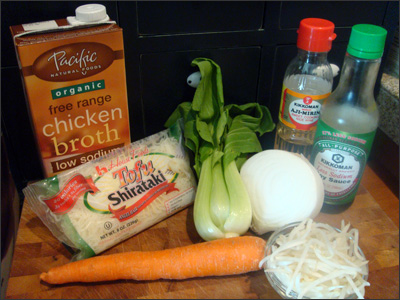
1/4 Cup thinly sliced white onion
1 Bok Choy – washed – cut off the end to separate leaves.
1/2 Cup Bean Sprouts – rinse and pat dry with paper towels
1/2 Large Carrot – sliced thinly
1 Package Tofu Shirataki Angel Hair Noodles
2 Cups Chicken Broth – you could use any broth – I only had low sodium, I would use regular next time.
2 Tablespoons Soy Sauce – I also ended up adding a bit to the top of the bowl once served.
2 Tablespoons Rice Wine
1 Tablespoon Canola Oil
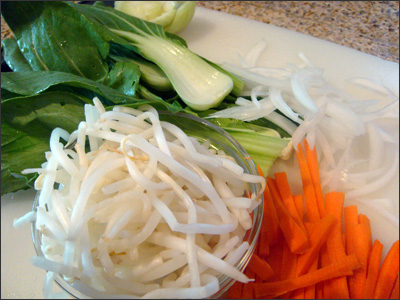
I got everything washed and chopped. I then rinsed the noodles and put them into the microwave for 1 minute to take care of the parboil.
I got all of my veggies going into the Canola oil. The burner was set to high. I let the veggies sizzle in the wok for a good 3-5 minutes. I then added 1 tablespoon of the soy sauce and 1 tablespoon of the rice wine to get the flavors going.
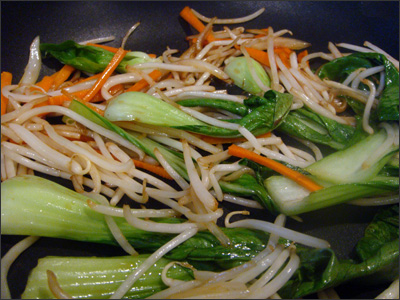
Once the veggies took on a grilled appearance and the bok choy shrunk in size, I added the noodles.
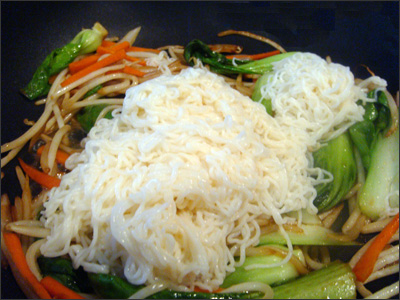
I used a fork to separate the noodles and then I added the chicken broth and remaining soy sauce and rice wine.

I continued to let everything cook for a few minutes on a lower temperature. I then served my ramen in a new bowl.
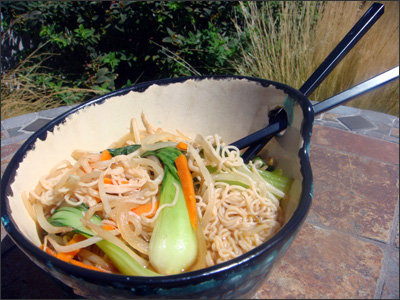
The story behind the bowl… I helped a girlfriend a few months back with her garage sale. She was helping to sell another girlfriend’s stuff – she sold her house and moved from the west coast to the east coast and really paired down. I was looking through some of the boxes and I found the bowl. I loved that it had the hole for the chopsticks and the teal color was amazing. Then I turned the bowl over and I knew I had to have it. The original owner of the bowl (Emilyn) had actually painted the bowl and her name was etched into the bottom. I scooped it up and now Emilyn’s bowl gets to be featured here on Foodiddy. I love my new treasure and that it has a story.
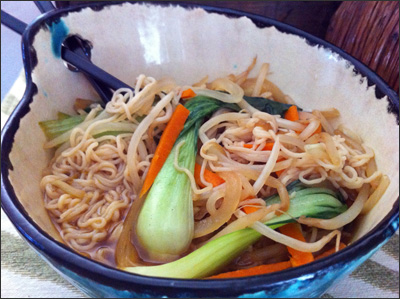
Pretty bowls and plates make eating that much more enjoyable. Treat yourself to some fun and exciting bowls, dishes and placemats. You are worth it. I usually find mine on the sale shelves of HomeGoods, TJMaxx, Tuesday Morning or Ross. I have an entire shelf of single dishes and bowls and I love each of them for different reasons.

